

Milk and Coconut Jelly - Simple and Quick
About Milk and Coconut Jelly
This is one of my favorite desserts. I remember the first time I had it in a restaurant in Taiwan around 2015. Every time I visit that restaurant, I buy an extra box of jelly as my after-meal dessert for the next few days.
When I tried to make milk and coconut jelly at home, I found it simple, quick, and easy. Additionally, it is a good recipe to use up the milk that is about to expire.
This milk and coconut jelly is a gluten-free dessert. If you need some ideas for the dessert to serve your guests at the party, I think this is a good idea!
Difficulty: simple
Healthy level and features: 3/5 - gluten-free
Time: 20-30 minutes for making jelly, 3-4 hours for cooling
Ingredients:
Full cream milk: 300g
Thicken cream/coconut milk: 200g (optional)
Corn flour: 50g
Coconut sugar: 30g (adjustable)
Desiccated coconut

Tips for choosing ingredients:
I strongly recommend using full cream milk because the milk flavor is an important element of this dessert.
If you do not have the thickened cream or coconut milk, you can use full cream milk instead. By adding the thickened cream, the jelly will have a stronger creamy flavour. By adding the coconut milk, the jelly will have a stronger coconut flavour.
I use coconut sugar because it is unrefined and has a lower glycemic index (GI). You can use any type of sugar you have at home such as honey, brown sugar, maple syrup…etc. Just need to be aware that if you use sugar with a strong flavour, this means you can taste it when you eat the jelly.
Corn flour is the same as cornstarch in Australia. It is different from the corn meal.
Steps:
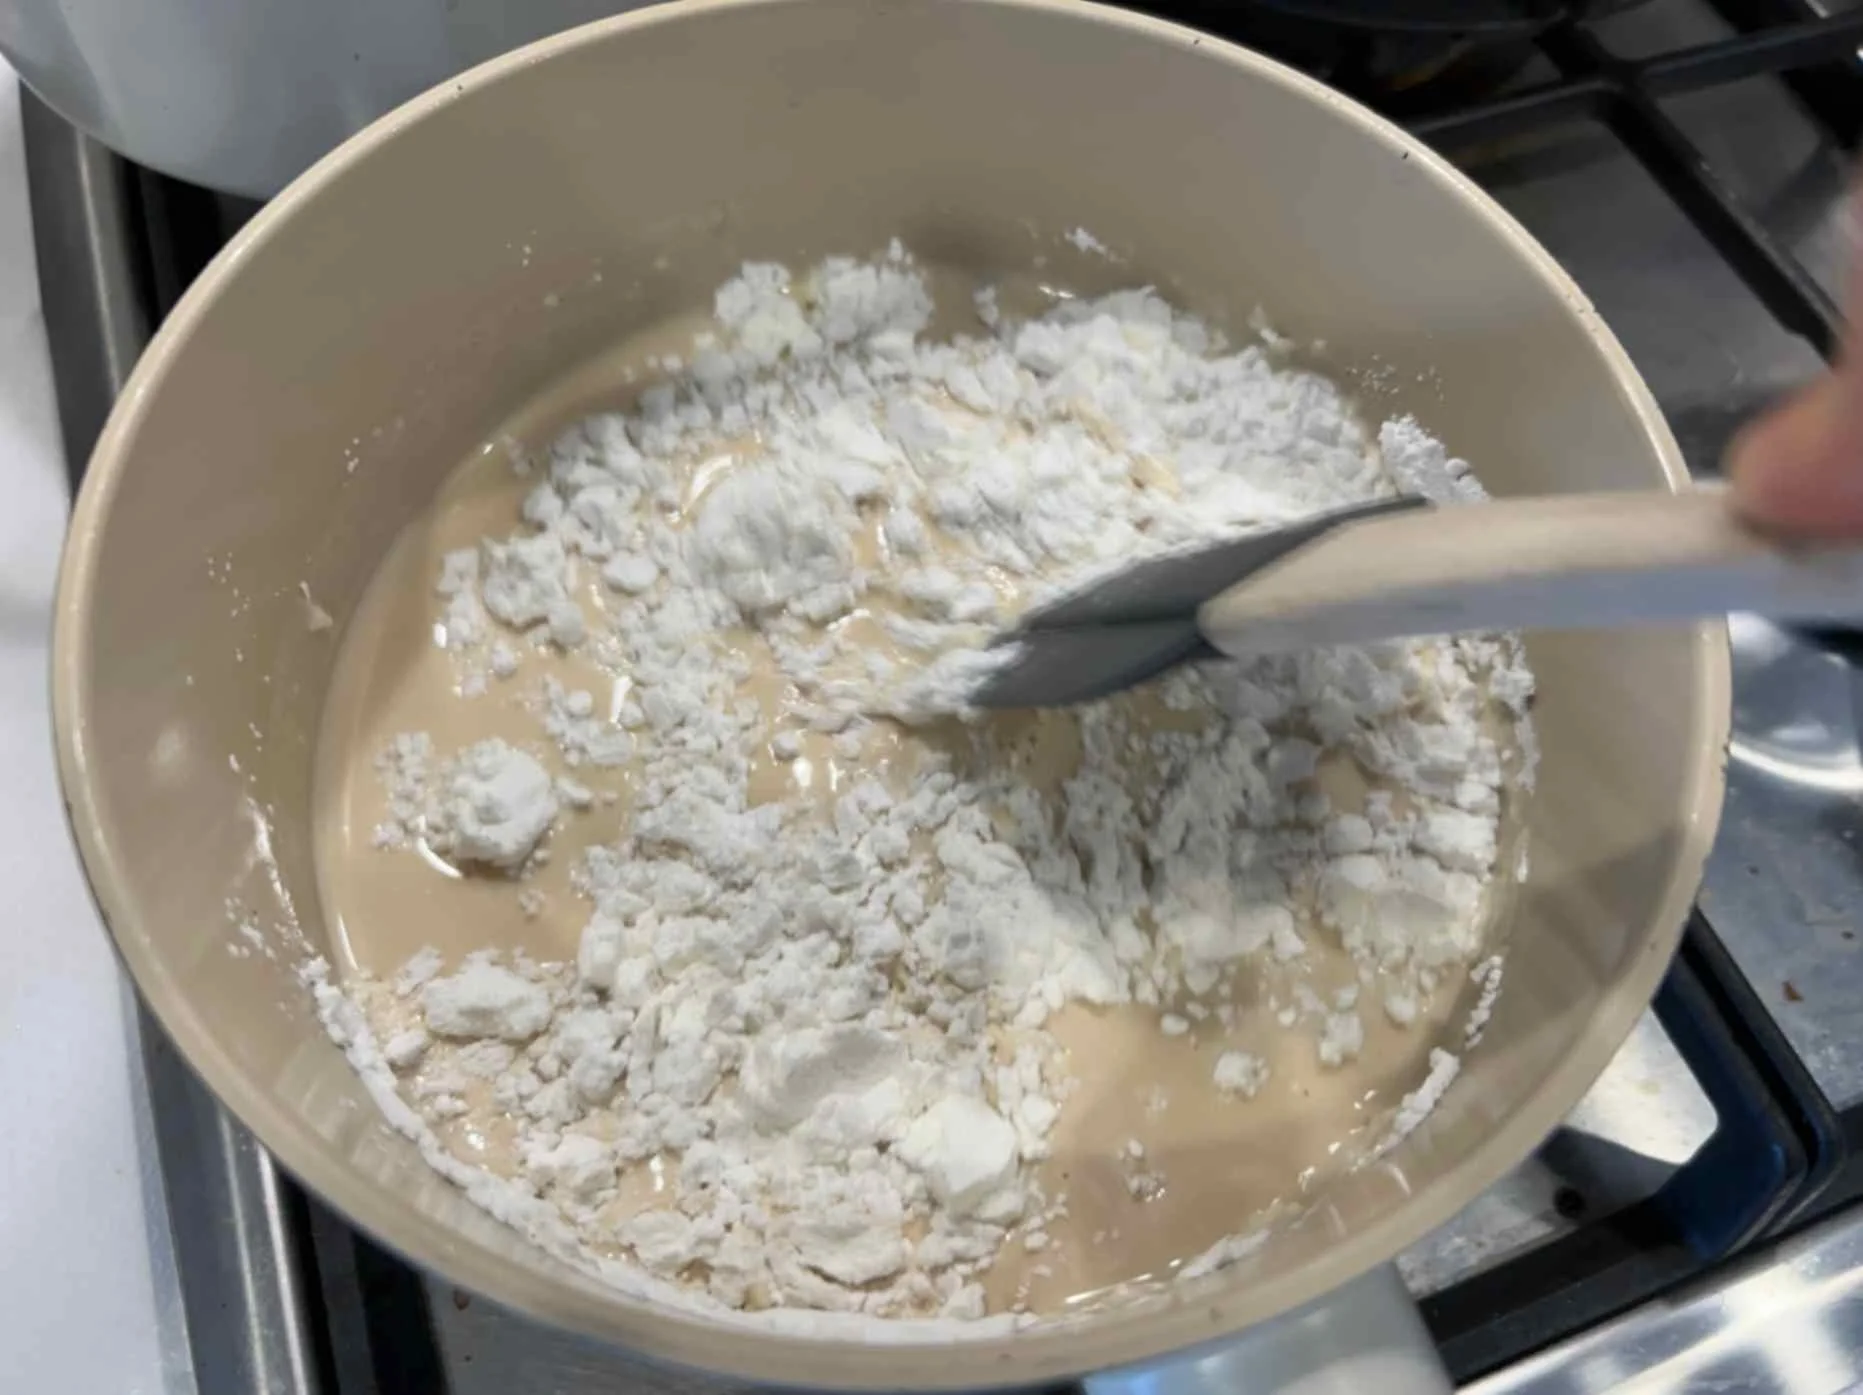
1. Add milk, and sugar and thicken milk/coconut milk in the non-stick pan. Put it on the stove and turn on the medium to small flam. Keep stirring the liquid and make the sugar dissolve.
It is important to make sure the liquid is not boiled all the time. If it is going to boil, you need to turn it to a smaller flame.
After the sugar is dissolved, you can taste the sweetness level of the liquid. You can add more sugar at this stage if you prefer the sweeter flavour.


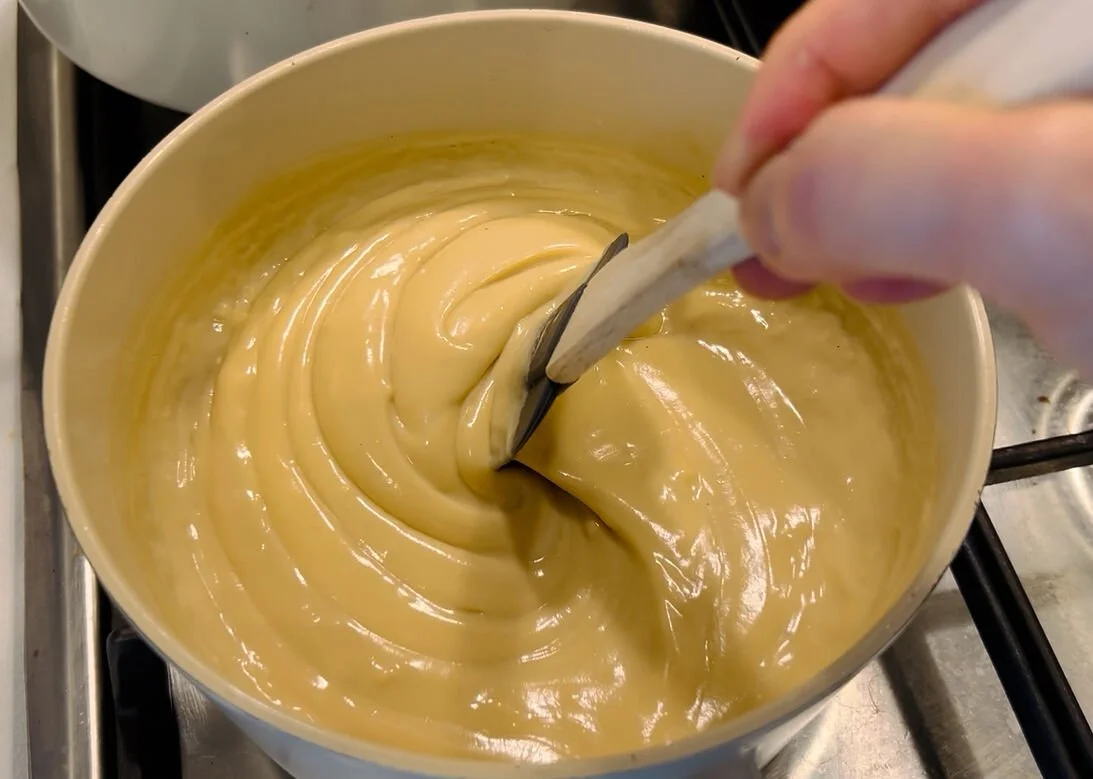
2. Add corn flour and keep stirring (non-stop) until the liquid is thickened like glue.
To make sure the liquid is not boiled, you can always use a small flame.

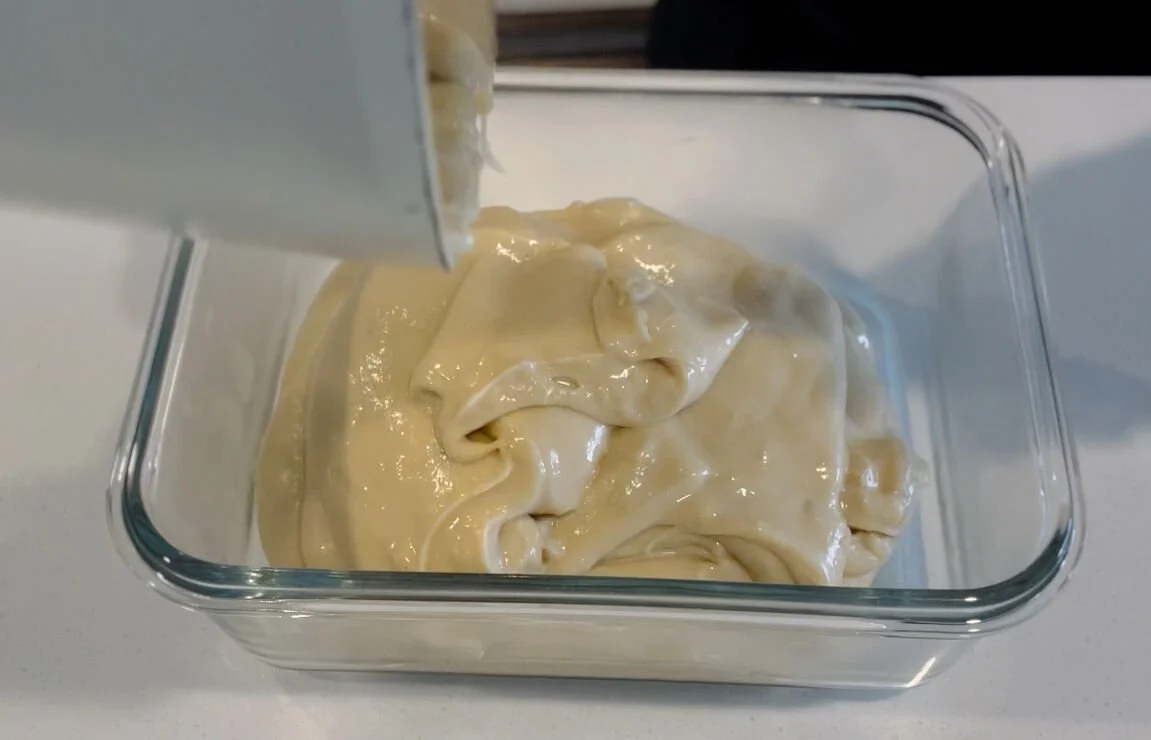
3. Pour the thickened liquid into a dry and clean glass container and spread to make the surface flat.
It is highly recommended to use a glass container because the jelly will not stick to it when you unmold it. You can also use a stainless steel container.


4. Cool it down for around 1 hour before putting it into the fridge.
5. After putting it in the fridge for 3-4 hours, take it out to unmold it. Cut it into small cubes making it suitable for one bite.
You do not need to unmold it all at once. You can cut the portion that you would like to serve and just take that portion out of the container.
It is normal that you see some liquid diffuse out at the bottom of the container afterward.
To keep the jelly in the container fresh, make sure you use a dry and clean knife to cut it when you take out the portion that you would like to serve.


6. Pour desiccated coconut into a bowl/plate and put small jelly cubes on it. Gently coat the small jelly cubes with desiccated coconut.
I recommend pouring more desiccated coconut into a bowl/plate because it will be easier for you to coat the jelly cubes.


Important tips for the milk coconut jelly
The key to making successful jelly is the proportion of all liquid ingredients and flour which is 10:1. This proportion will make sure the jelly has the right firmness and won’t take too long to get thickened.
This milk and coconut jelly can be made into different flavors as well. I will share more flavours afterward. If you want to know how to make it into a specific flavour, please feel free to leave a comment below. I hope you enjoy making and having this milk and coconut jelly!